
S2000 Wheel Alignment: Check the Adjusting Bolts Before Chasing the Numbers
Factory Settings, What They Mean and Why the Adjusting Bolts Must Move
Part of our Honda S2000 Restoration & Tuning Journal Series
Over the past few weeks, we have looked at several aspects of S2000 suspension tuning.
For anyone preparing to modify their suspension for the first time, I would like to repeat one important message:
Buy the wheels last.
If your aim is to fit the widest possible wheels beneath standard bodywork, complete the suspension setup first.
Fit the coilovers, choose the ride height, install any necessary suspension parts and carry out your initial road testing on the original wheels. You can calculate the difference in offset and use spacers to check where the outer face of the proposed wheel would sit.
If you buy the wheels before finalising the ride height and alignment, you may later discover that they contact the suspension, protrude beyond the bodywork or require more negative camber than you actually want.
Today, however, we are going back to basics and looking at wheel alignment on the Honda S2000.
Our Honda S2000 being checked with a hub-mounted alignment system J-TEC Dummy Wheels and Ikeya Formula Maple A1 Gauge.
Why should you check the wheel alignment?
Wheel alignment describes the direction in which the four wheels point and the angles at which they meet the road.
It does not necessarily remain unchanged for the lifetime of the car.
As the mileage increases, bushes, ball joints and other suspension components wear. Springs and dampers can settle, altering the ride height and therefore the suspension geometry. A hard impact with a pothole or kerb can also change the alignment.
Uneven tyre wear, an off-centre steering wheel and different handling characteristics when turning left or right can all be reasons to inspect the suspension and measure the alignment.
The S2000 is also a car in which relatively small changes can produce a noticeable difference from the driver’s seat. A periodic alignment check can therefore reveal more than a set of numbers. It may draw your attention to changes elsewhere in the suspension.
What can be adjusted on an S2000?
The standard S2000 suspension provides adjustment at both the front and rear.
At the front, you can adjust:
Toe
Camber
Caster
At the rear, you can adjust:
Toe
Camber
Front toe is adjusted through the track rods. The other settings are controlled mainly by eccentric adjusting bolts and cams, which move the lower arms and control arms inwards or outwards.
These adjustments are not completely independent.
The workshop manual specifically notes that changing camber will also change toe. Whenever caster, camber or toe is adjusted, the related front or rear alignment readings must therefore be checked again.
What are the standard S2000 alignment settings?
The 2000–2008 workshop manual supplied for this article gives the following standard settings:
Factory wheel-alignment specifications from the 2000–2008 US-market Honda S2000 workshop manual. Always confirm the model year and market specification before use.
These figures come from the US-market manual supplied for this article. Before applying them to an individual car, its model year, market specification, fitted components and intended use should be confirmed.
The manual also specifies a series of checks before measuring the alignment.
The parking brake should be released. Tyre sizes and pressures, wheel and tyre run-out, and the suspension ball joints should be checked. The car should then be bounced several times to allow the suspension to settle.
The vehicle should be empty, parked on a level surface and fitted with correctly inflated tyres. The specified cold tyre pressure is 220 kPa, or 32 psi, at both the front and rear.
For a car on standard suspension, the specified ride-height measurements are:
Front: 192–202 mm
Rear: 206–216 mm
These measurements are taken from the ground to the centre of the relevant lower-arm adjusting-bolt head.
The standard alignment figures are therefore intended to be used under defined measuring conditions. Simply bringing the numbers into range is not enough if the tyre pressures, ride height or condition of the suspension are incorrect.
On a modified car with coilovers, different tyres or a reduced ride height, the factory specifications remain a useful starting point. They are not necessarily the final answer.
What does each adjustment actually change?
Front toe
Viewed from above, the wheels have toe-in when their leading edges point towards one another. They have toe-out when the leading edges point away from one another.
A small amount of front toe-out can make the car respond more sharply when the driver first turns the steering wheel. The trade-off may be reduced straight-line stability and greater sensitivity to road surfaces.
Front toe-in generally adds straight-line stability, but too much can reduce the willingness of the car to change direction and can also increase tyre wear.
If motorway stability is important, zero toe or a small amount of toe-in may be a sensible direction. The standard front setting is already 0 ±2 mm, so the factory range is a logical place to start if there is no specific reason to depart from it.
Rear toe
The basic principle is the same at the rear, but rear toe has a particularly important influence on the stability of an S2000.
Rear toe-in generally makes the rear of the car more stable, including when power is applied while leaving a corner.
Moving towards rear toe-out can help the car rotate, but it can also make the rear less settled. In simple terms, it moves the balance towards oversteer.
Any departure from the standard rear toe setting should therefore consider motorway driving, wet roads and sudden changes of direction, as well as the behaviour wanted on a dry circuit.
Camber
Viewed from the front or rear, a wheel has negative camber when its upper edge leans towards the centre of the car.
Negative camber is sometimes used for appearance or to help accommodate wide wheels, such as a 9.5J setup, beneath the bodywork. Its real purpose, however, is to manage the tyre’s contact with the road while cornering.
During a corner, much of the load transfers to the outside tyre. The aim is to choose an angle that allows the tyre to use its contact patch effectively under that load.
More negative camber is not automatically better. Excessive camber can reduce straight-line contact, affect braking and accelerate wear on the inner shoulder of the tyre.
The appropriate figure therefore depends on the tyres, ride height, spring rates, dampers and the kind of roads or circuits on which the car is used.
Caster
Caster describes the angle of the steering axis when viewed from the side of the car.
One of its most noticeable effects is the force that helps the steering return towards the straight-ahead position after a corner. Increasing positive caster will generally increase this self-centring action and contribute to straight-line stability.
Caster also affects the camber of the front wheels as the steering turns, so it influences how the front tyres work during cornering.
On the S2000, caster is adjusted through the cam at the rear of the front lower arm. Moving it also affects camber and toe, so caster cannot simply be adjusted in isolation and then forgotten.
Accurate measurement is only the beginning. The suspension adjusters must still move freely before the settings can be corrected.
Which alignment settings are right for your car?
The correct answer depends on how the car is used.
An S2000 used mainly on normal roads and motorways does not have the same requirements as one used on fast country roads or driven regularly on a circuit.
The same alignment figures may also feel different depending on the tyres, ride height, spring rates, dampers, bushes and body reinforcement fitted to the car.
Start by understanding the factory settings. Measure the car as it currently stands, and compare the results with tyre wear and the way the car feels on the road.
You can then decide what you actually want to change. Perhaps you want to retain good straight-line stability, improve the initial response or make better use of the outside tyre during cornering.
Large or aggressive figures are not automatically evidence of a good suspension setup. Tuning means finding a suitable balance for the car and its driver.
Check this before booking an alignment
In the UK, wheel alignment can be measured and adjusted by garages equipped with a computerised four-wheel alignment system. Prices and the amount of adjustment included vary, so it is worth confirming the scope of the work when booking.
There is, however, one important S2000 problem to investigate first:
Seized suspension adjusting bolts.
You can book the alignment, place the car on the machine and obtain a complete set of measurements. However, if the adjusting bolts are seized, the technician will not be able to alter the affected settings.
We have dealt with several examples and enquiries involving seized S2000 suspension bolts. The problem is not limited to high-mileage cars, so low mileage should not be treated as proof that the bolts will move.
The bolt passes through a metal sleeve inside the suspension bush. Moisture and corrosion can cause the bolt and sleeve to seize together. Removing the nut does not help if the bolt can no longer slide out of the sleeve.
A seized bolt does not necessarily mean that the arm has stopped moving completely. The rubber bush may still flex. Nevertheless, the alignment can no longer be adjusted correctly, and the condition of the bush and the surrounding components should not simply be assumed to be satisfactory.
A car may have excellent paintwork and a beautifully detailed body, but that does not tell us whether the suspension bolts can still be adjusted or whether the bushes remain in good condition.
This seized adjusting bolt could not be removed normally and had to be cut from the suspension arm.
What happens when an adjusting bolt has seized?
If the corrosion is relatively light, penetrating fluid and careful removal may still release the bolt.
When the bolt and bush sleeve have become completely joined, surgery is usually required.
In other words, the bolt has to be cut.
Cutting through both sides allows the suspension arm to be removed, but sections of the bolt remain trapped inside the bush sleeve. A new bolt cannot simply be pushed through the old bush.
The bush must therefore be replaced. Depending on the condition of the arm and the practicalities of the repair, replacing the complete suspension arm may sometimes be the better option.
The photographs prepared for this article show the cut bolts, the remains trapped inside the bush sleeves, old and new adjusting hardware, replacement bushes and the suspension after reassembly.
Ignoring the problem is also a choice. Eventually, however, it may return when the ride height is changed, uneven tyre wear develops or deterioration of the bush becomes more serious.
If an alignment is being planned, checking that the adjusting bolts move and inspecting the bushes first makes the eventual cost and scope of the work much easier to understand.
Even after the arm was removed, the remains of the bolt were still seized inside the bush sleeve.
Make the suspension adjustable before chasing the figures
Setting the wheel alignment on an S2000 is not just a matter of making the screen turn green.
Check the tyres and pressures. Inspect the ball joints and bushes. Decide the ride height. Confirm that the adjusting bolts move correctly. Only then should the four wheels be measured and adjusted for the way the car will be used.
Afterwards, drive the car and assess the result.
Once that work has been completed, you can make the final wheel choice.
TR imports UK keeps a full S2000 suspension bolt kit in stock. Every car is different, so we inspect the location of the seizure and the condition of the bushes and arms before recommending the appropriate work.
If you would like advice about an S2000 suspension refresh or an inspection before wheel alignment, please contact us.
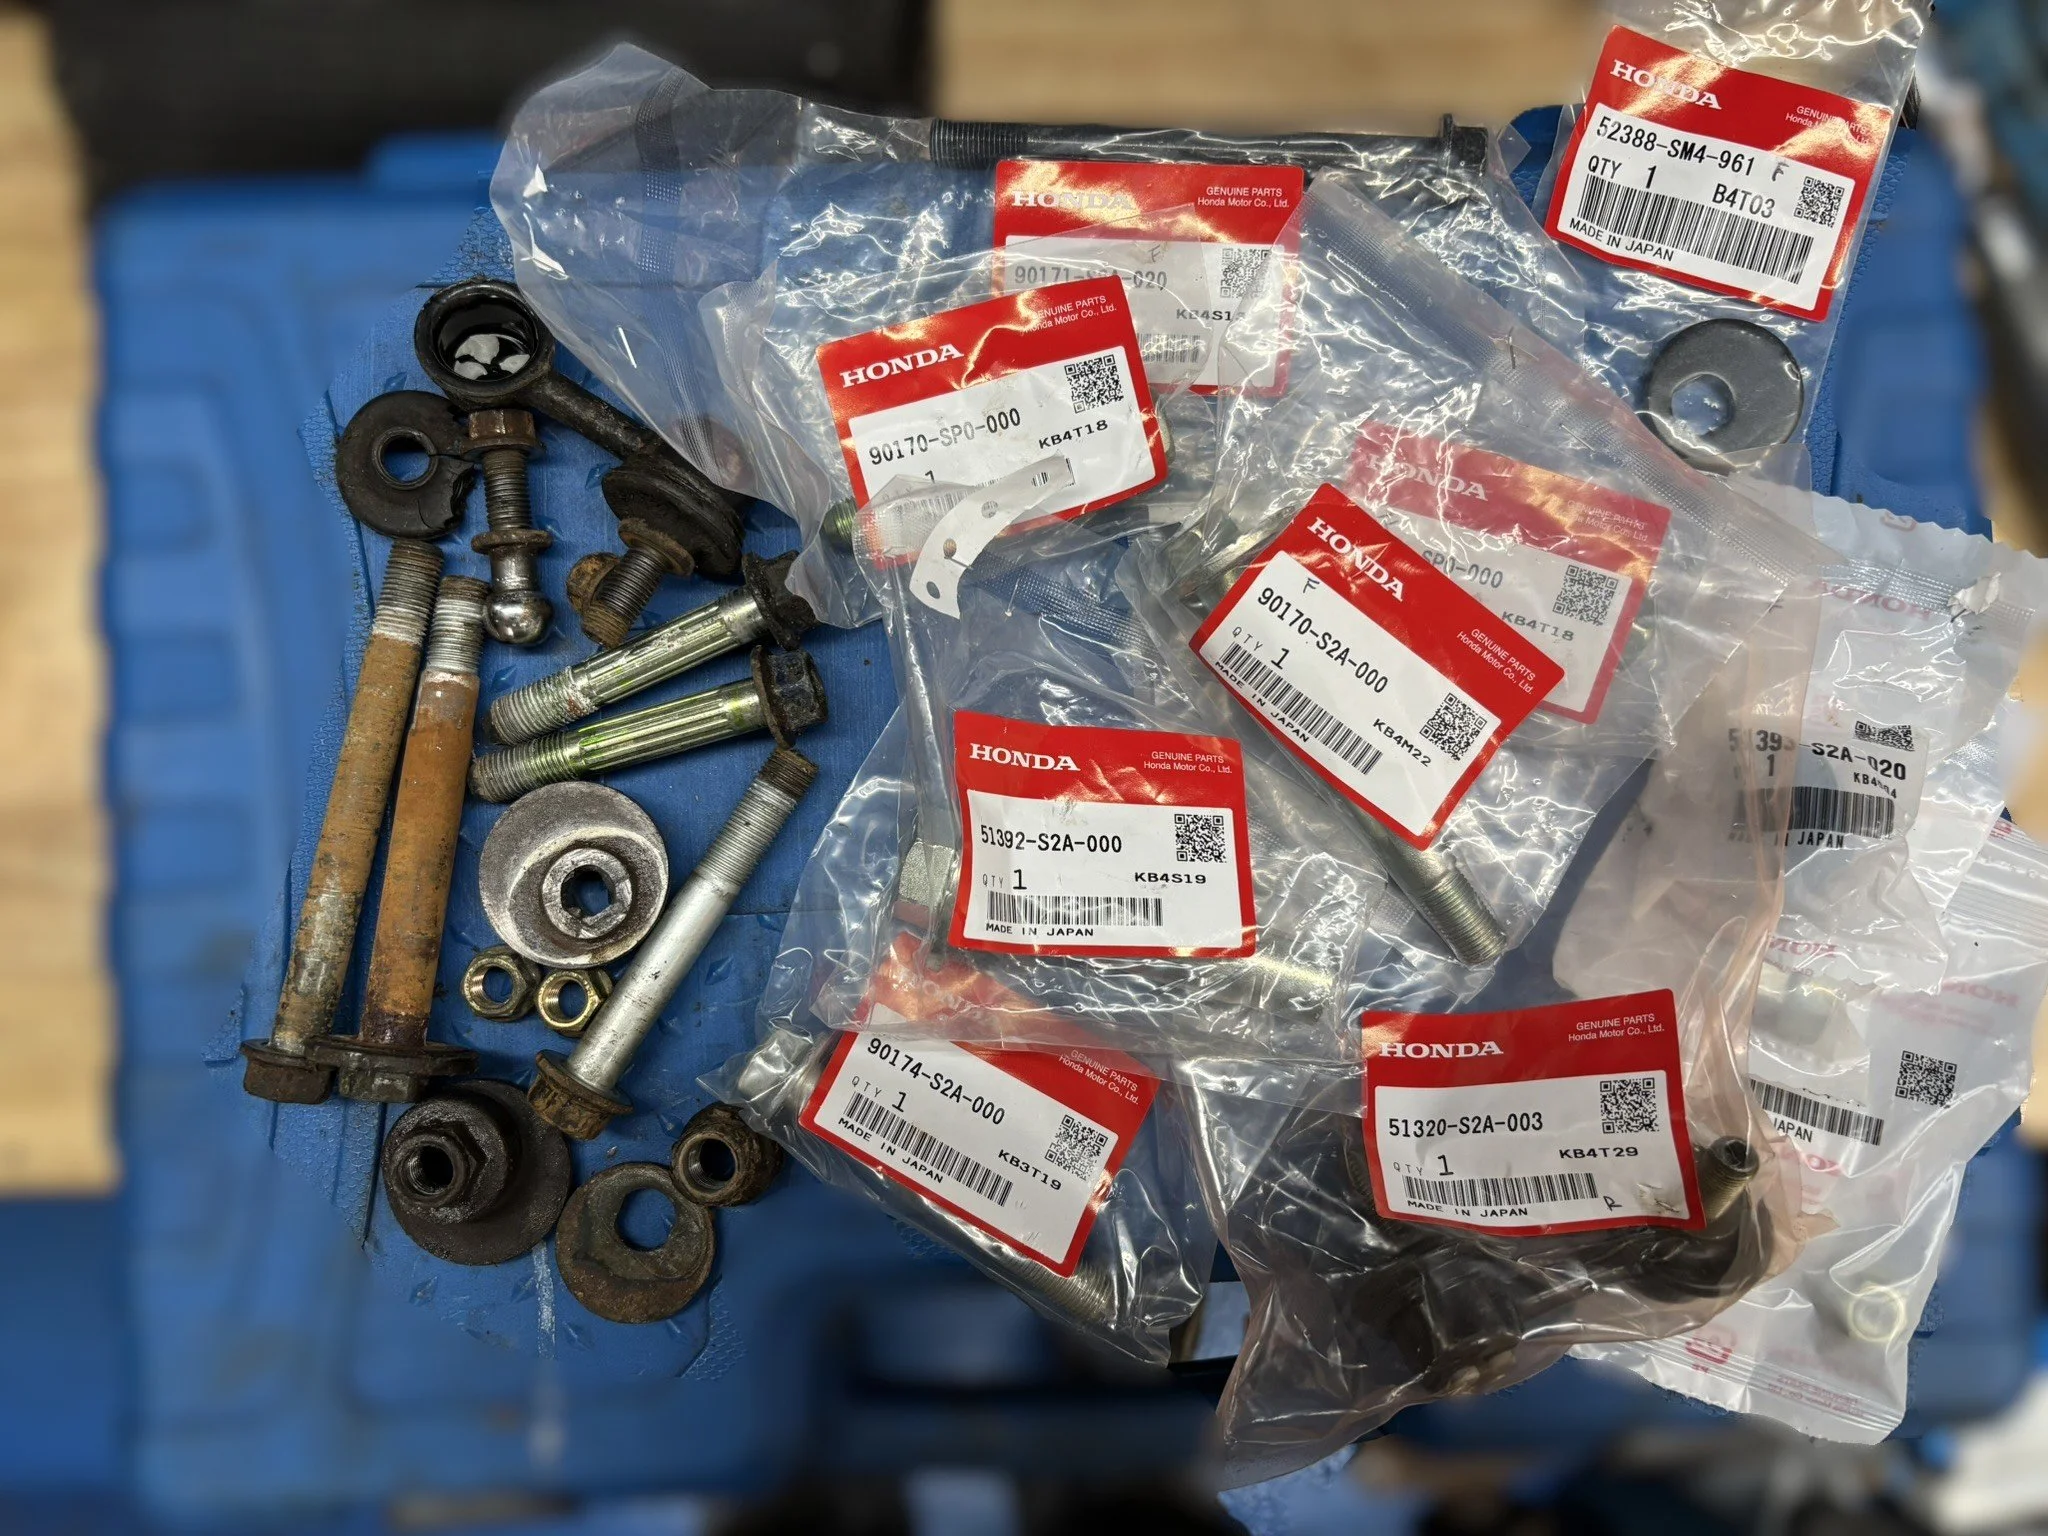
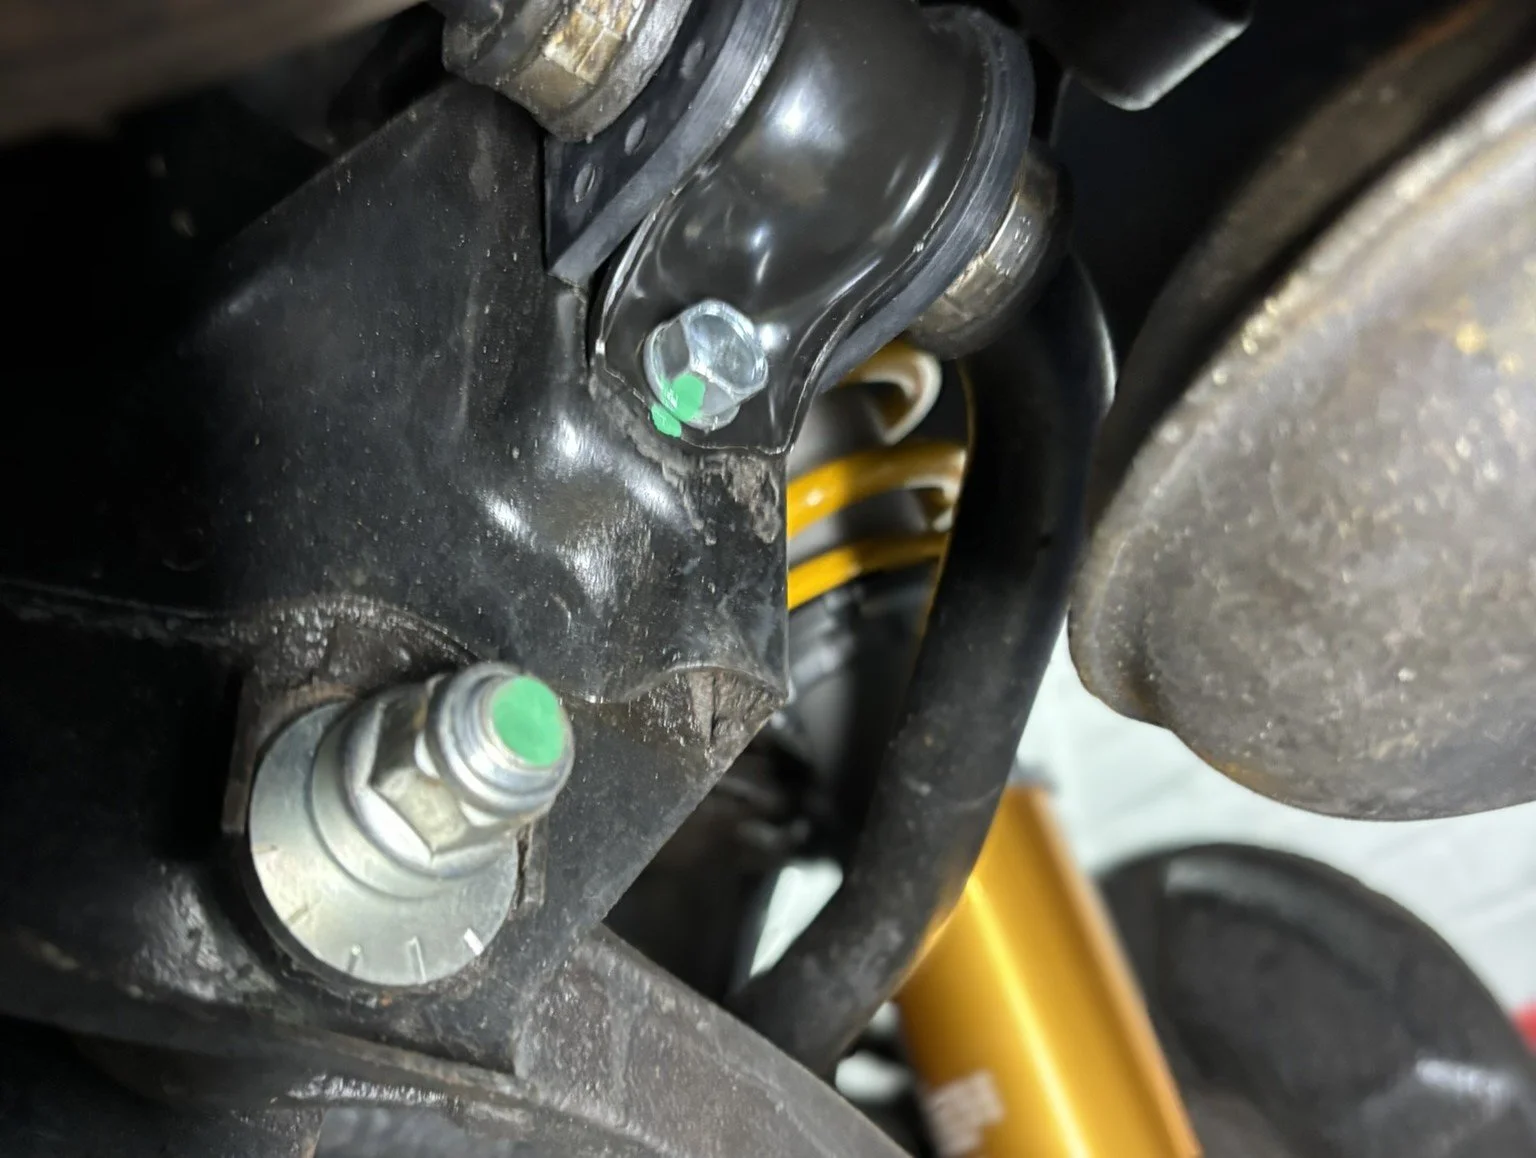
The seized hardware alongside the replacement Honda parts required before the alignment could be completed properly.
See the Complete S2000 Restoration
Explore the complete restoration and development of our demonstration S2000—and the workshop experience behind it: